Create New Hugo Blog Site in Azure SWA
Overview
Do you just love doing cool stuff? This post details the steps to create this blog using the Hugo static site generator hosted in Azure static web apps using Windows. The price is just your time and effort. The tools in the prerequisites are free.
Prerequisites
- GitHub account
- Azure subscription
- Hugo installed
- From the link above, scroll to assets > Click
Show all nn assets. - Use extended version recommended for modern themes, e.g, hugo_extended_0.115.1_windows-amd64.zip.
- Unzip, rename the folder to hugo-amd64 and add the folder to c:\program files
- Add %ProgramFiles%\hugo-amd64 folder to your path in system settings > environment variables.
- I may make a blog post with these details.
- From the link above, scroll to assets > Click
- Pick a Hugo theme. I use fuji for this post.
- Visual studio with Git and Powershell installed
Set up Local GitHub Repo
Create Empty GitHub Repository
- Navigate to https://github.com/new > Name - swa-hugo-blog.
- Optional: click Private.
- Click Create repository.
Create a New Local GitHub Repository
- Open bash.
- Navigate to the appropriate folder for this GitHub repo, maybe Documents\repos.
- Enter these commands in bash. Change the site to your site name.
|
|
- You can ignore warnings from the
git add -Acommand above.
Download the Theme
- Navigate to the repository containing your desired Hugo theme, e.g., https://github.com/dsrkafuu/hugo-theme-fuji
- Click Code > Download zip > unzip file to folder > rename the folder to something like ‘fuji’

- Copy or move this folder to your repositiory’s themes folder
Visual Studio Code tweaks
Open your repo folder in VS Code for these steps.
Update hugo.html in General / fuji
If you installed Hugo after version 0.110 (January, 2023), you should have a hugo.toml file which replaces the config.toml file. Most theme guides instruct you to copy the config.toml file to the root of your project, but better is to use the contents of the theme’s config.toml file to overwrite the hugo.toml file.
Then make these changes as appropriate. If you are not using the fuji or lightbi theme, there may be different settings to look at.
|
|
Update [[menu.link]] items as needed.
Update footer
The fuji footer is in themes\fuji\layouts\partial\footer.html. I changed Source Code to my company Bullseye Cosulting and removed the Fuji link. I’ll keep link to Hugo for now.
|
|
hugo.toml lightbi-specific updates
Here are some tweaks I made to get the lightbi theme right.
|
|
[Params]section changes
|
|
- comment out most of [Author]
- Update
[[menu.main]]items as needed.
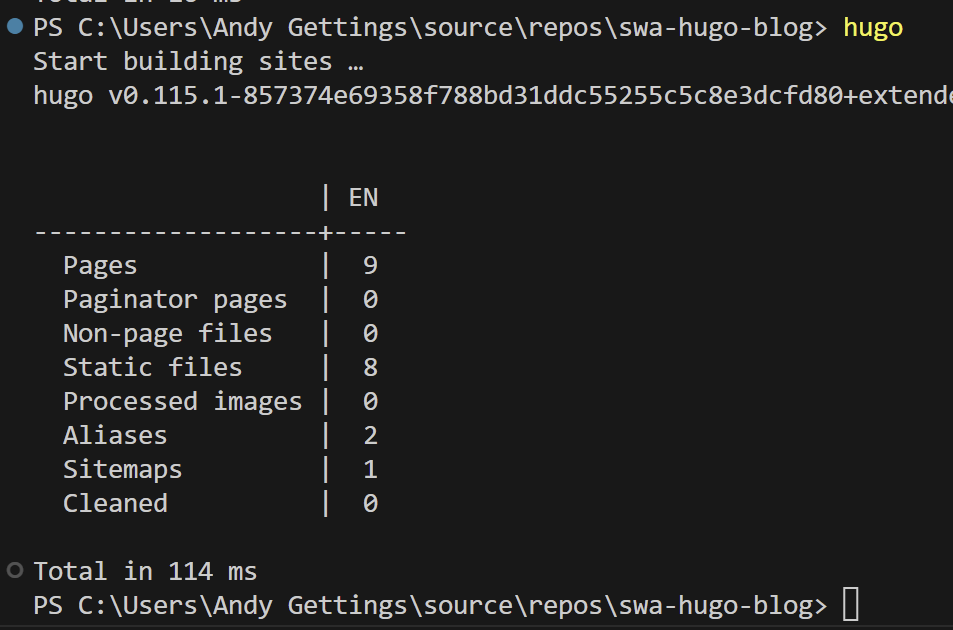
Phew. You should now be able to view your site. In VS Code PowerShell, run
|
|
Sign into Azure
Complete these steps
- Create a resource
- Search for Static Web App > Static Web App > Create
- I created a resource group called
free-swa-eus2for all my SWAs to make it easy to see if I’m getting close to the limit of 10. You can make a new resource group. - Name
swa-hugo-blog - Choose the appropriate region.
- Enter the GitHub Organization, Repository and Branch information.
- Choose
Hugoin the Build Presets dropdown. - Set
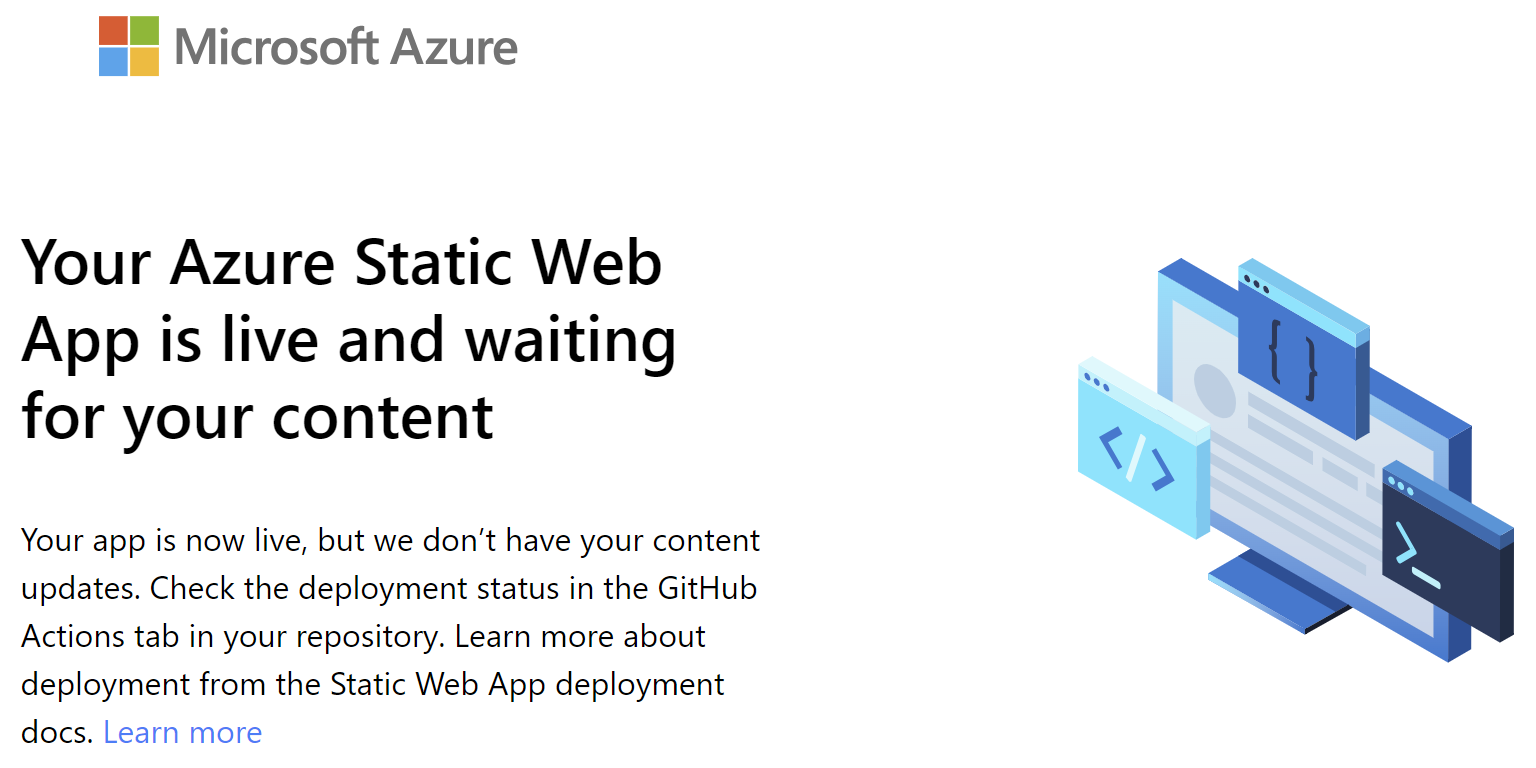
App Locationto/public. *Note that his causes the initial GitHub workflow action to fail. This is a good test to see if you are receivng email notification of failed GitHub jobs. If you prefer, you can use VS Code to update the .github/workflows/[SWA-IDKEY].yml file after you create the SWA with this code:
1app_location: "/public" # App source code path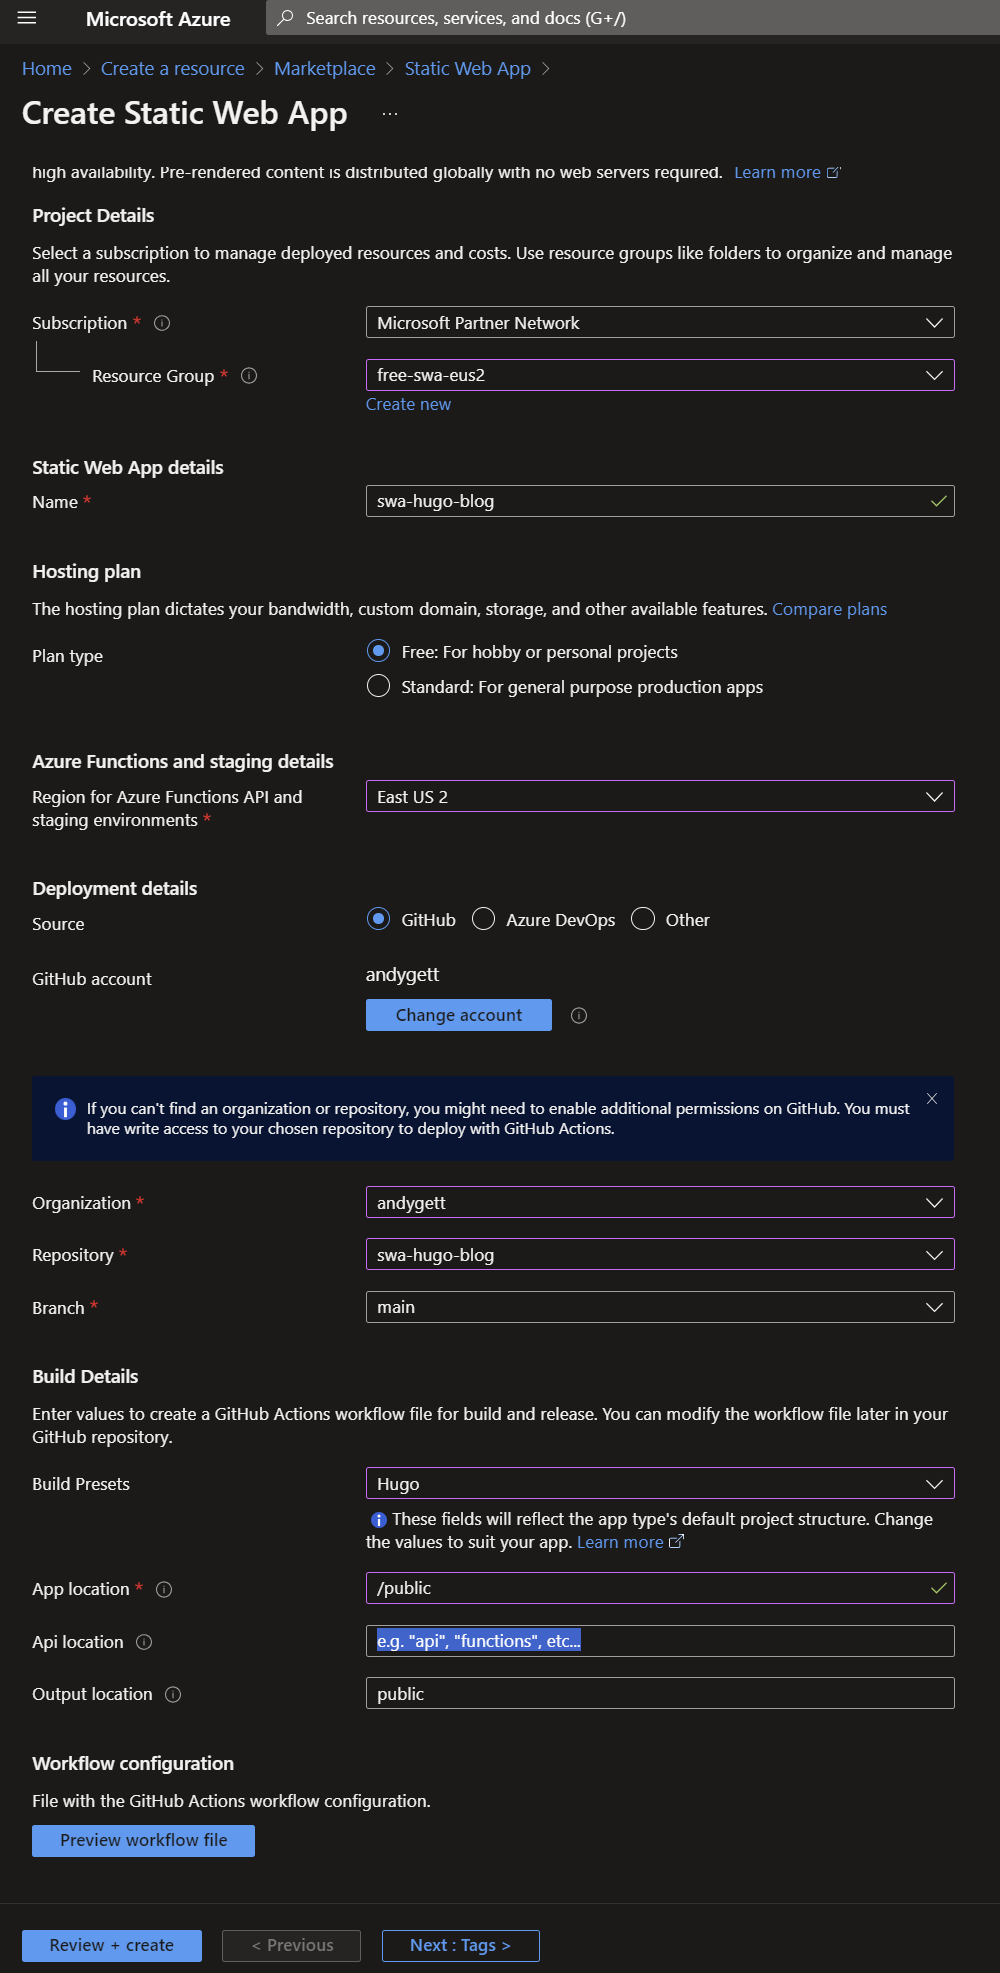
- Click Review + create > Create > Go to resource.
- I created a resource group called
Update hugo.toml again
Use the public URL from your Azure Static Web App, something like,
|
|
Build and Commit to Git
- In powershell, run
|
|
- Click the source control icon > Message is
fuji theme, initial footer updates, etc.commit > Yes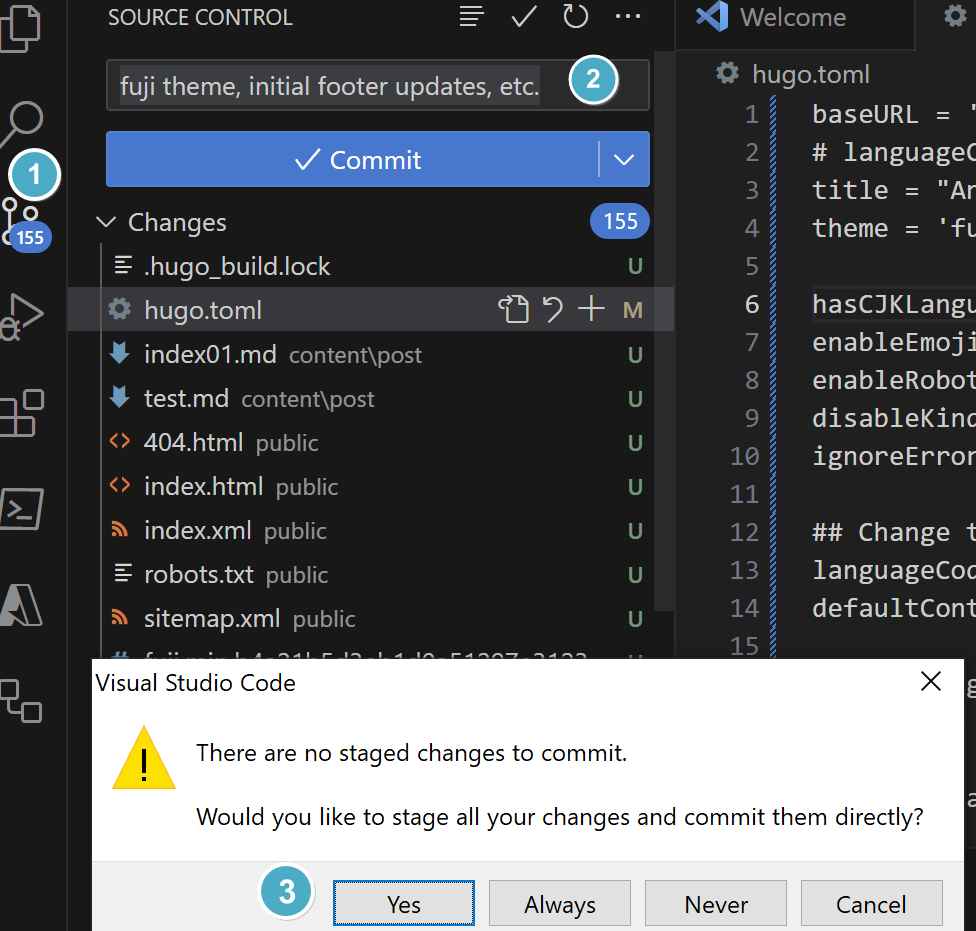
- Click Sync Changes > OK
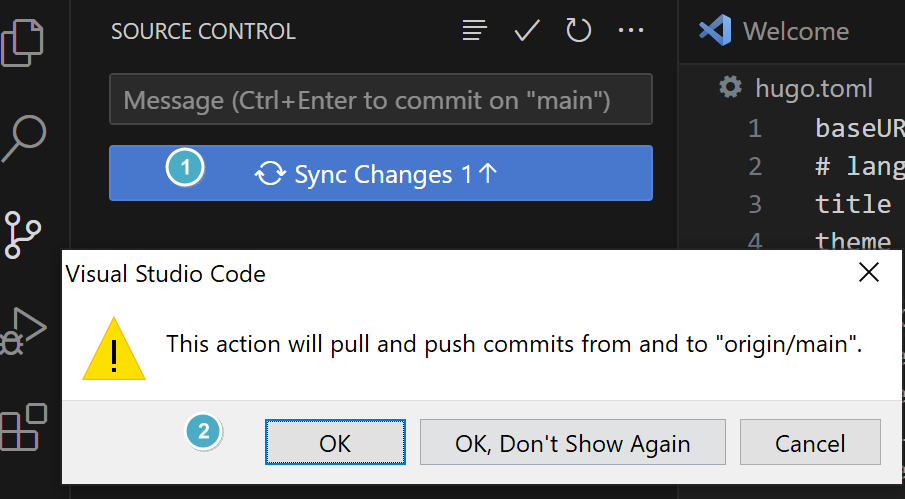
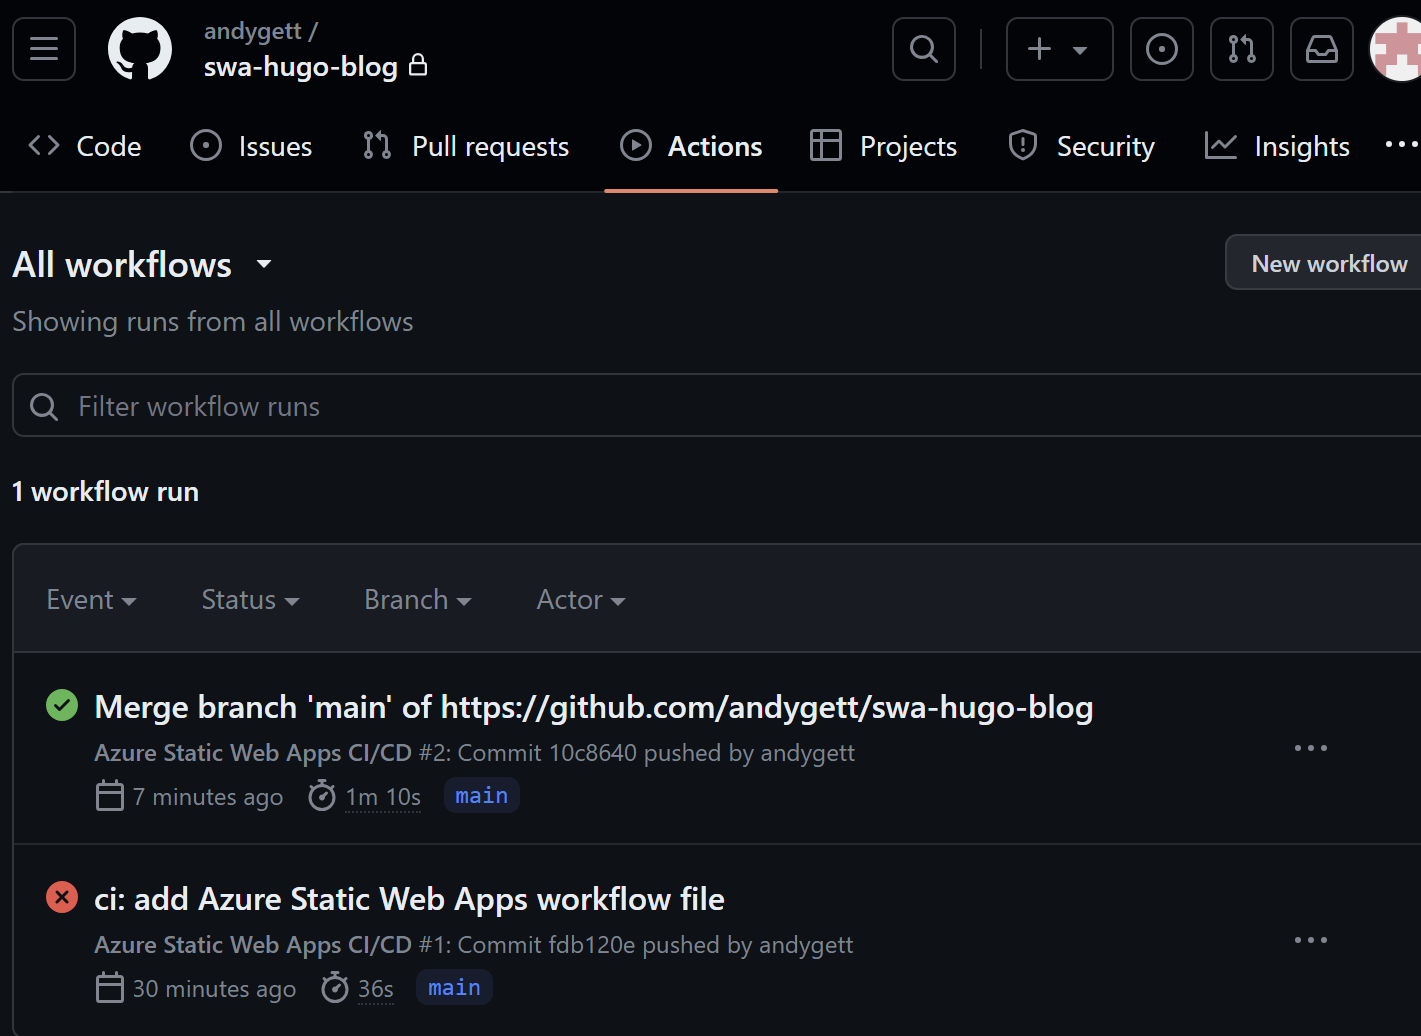
- This will kick off the workflow job to move the content to the Azure SWA. You can monitor the progress in the actions tab of the GitHub project. When the light goes green, you can load the public URL from your Azure Static Web App to view your site.